The Canvas is where all of your content goes. It shows you a representation of the page you’re working on with additional controls to let you select, traverse, move, duplicate and delete your element or component. When you first open the canvas you will see limited controls, but once you start adding components more options will display based on the component added.
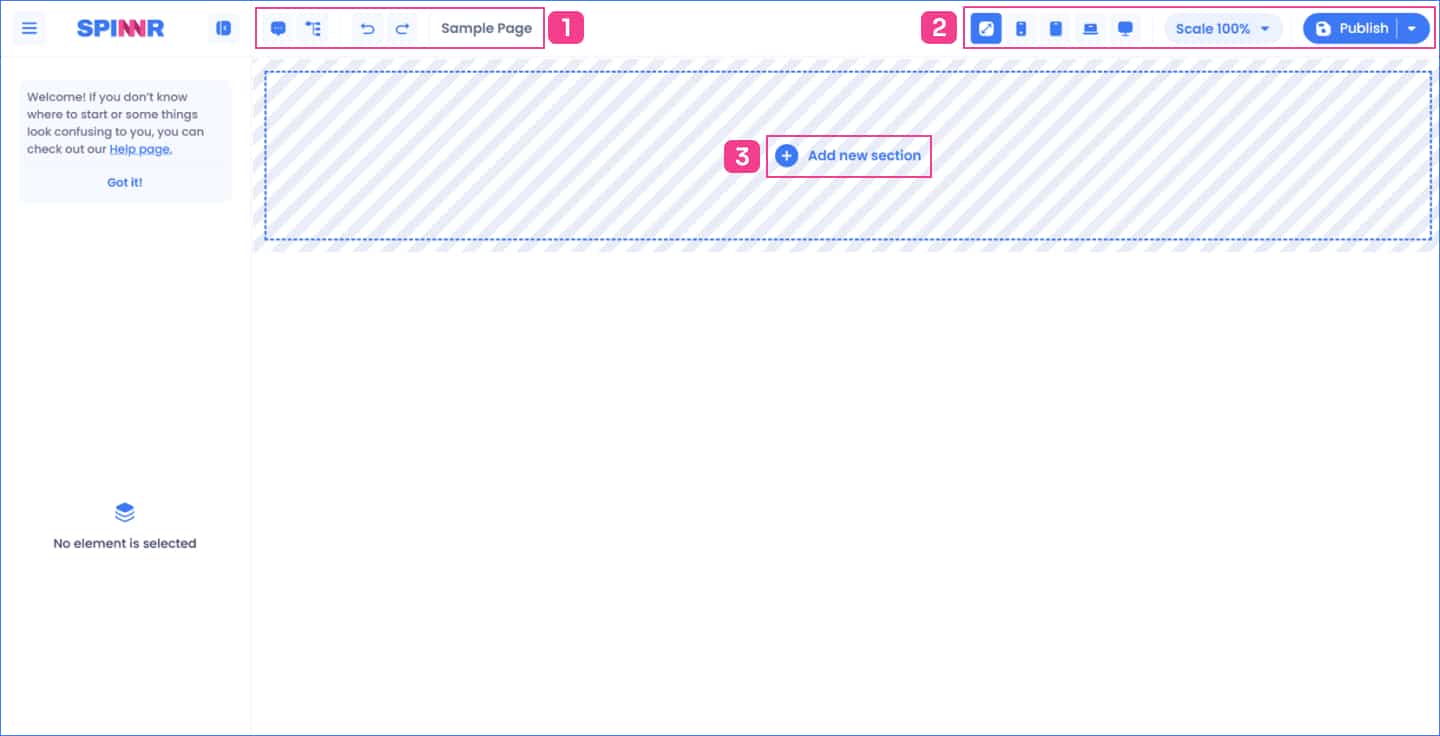
1 – Page Options #
Commenting (coming soon) #
Soon to be released is the commenting option for Pages. Check back soon…
Structure Tree #
The structure tree can be found at the top of the SPINNR Canvas and allows you to view the structure of elements on the page in a hiearchal view. You can then click on the cog, change the order, edit, or delete elements. The reordering of elements will move the element within the parent element.
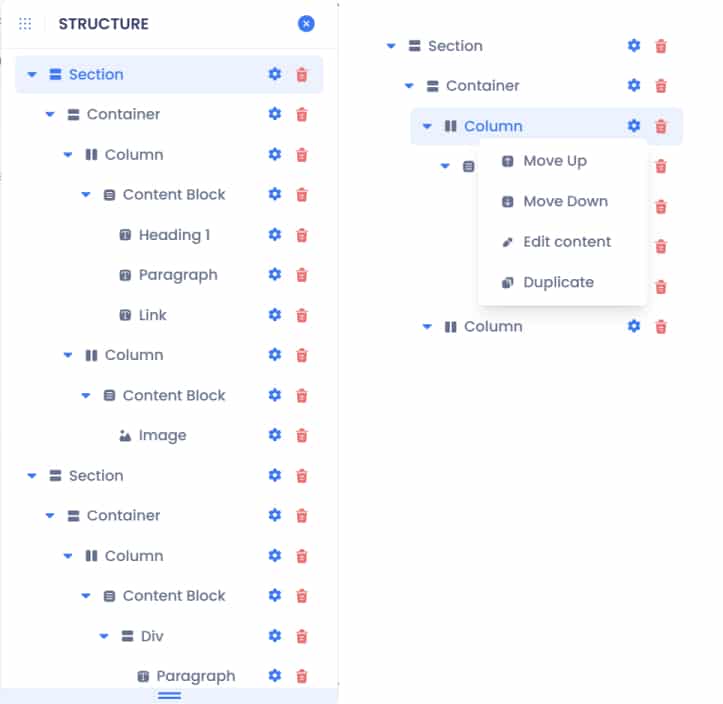
You can find some more information under Traversing the html structure
Undo and Redo #
Occasionally, you might make a change to the page that is unintentional or gives you an unintended or undesirable result. For these circumstances, you can use the Undo and Redo buttons up to 5 times.
Undo will revert the last change on the page. Redo will reverse the effect of the Undo.
Page name #
The name of the page you are editing is displayed here
2 – Viewport Controls and Publishing #
Viewport screens #
For responsive deisgn it is best to review the p[age in different screen sizes based on mobile, tablet, large and xtra large screen sizes.
Scaling #
You can choose a viewport and then scale the screen. Useful when you want to see more of the page on the screen
Publish #
Saves and publishes the changes to WordPress or Directus. There is also the option to publish the changes to WordPress at a later date/time.
3 – Adding Elements #
Here you can add sections to your page. See Adding Sections for more details
Controls for page elements #
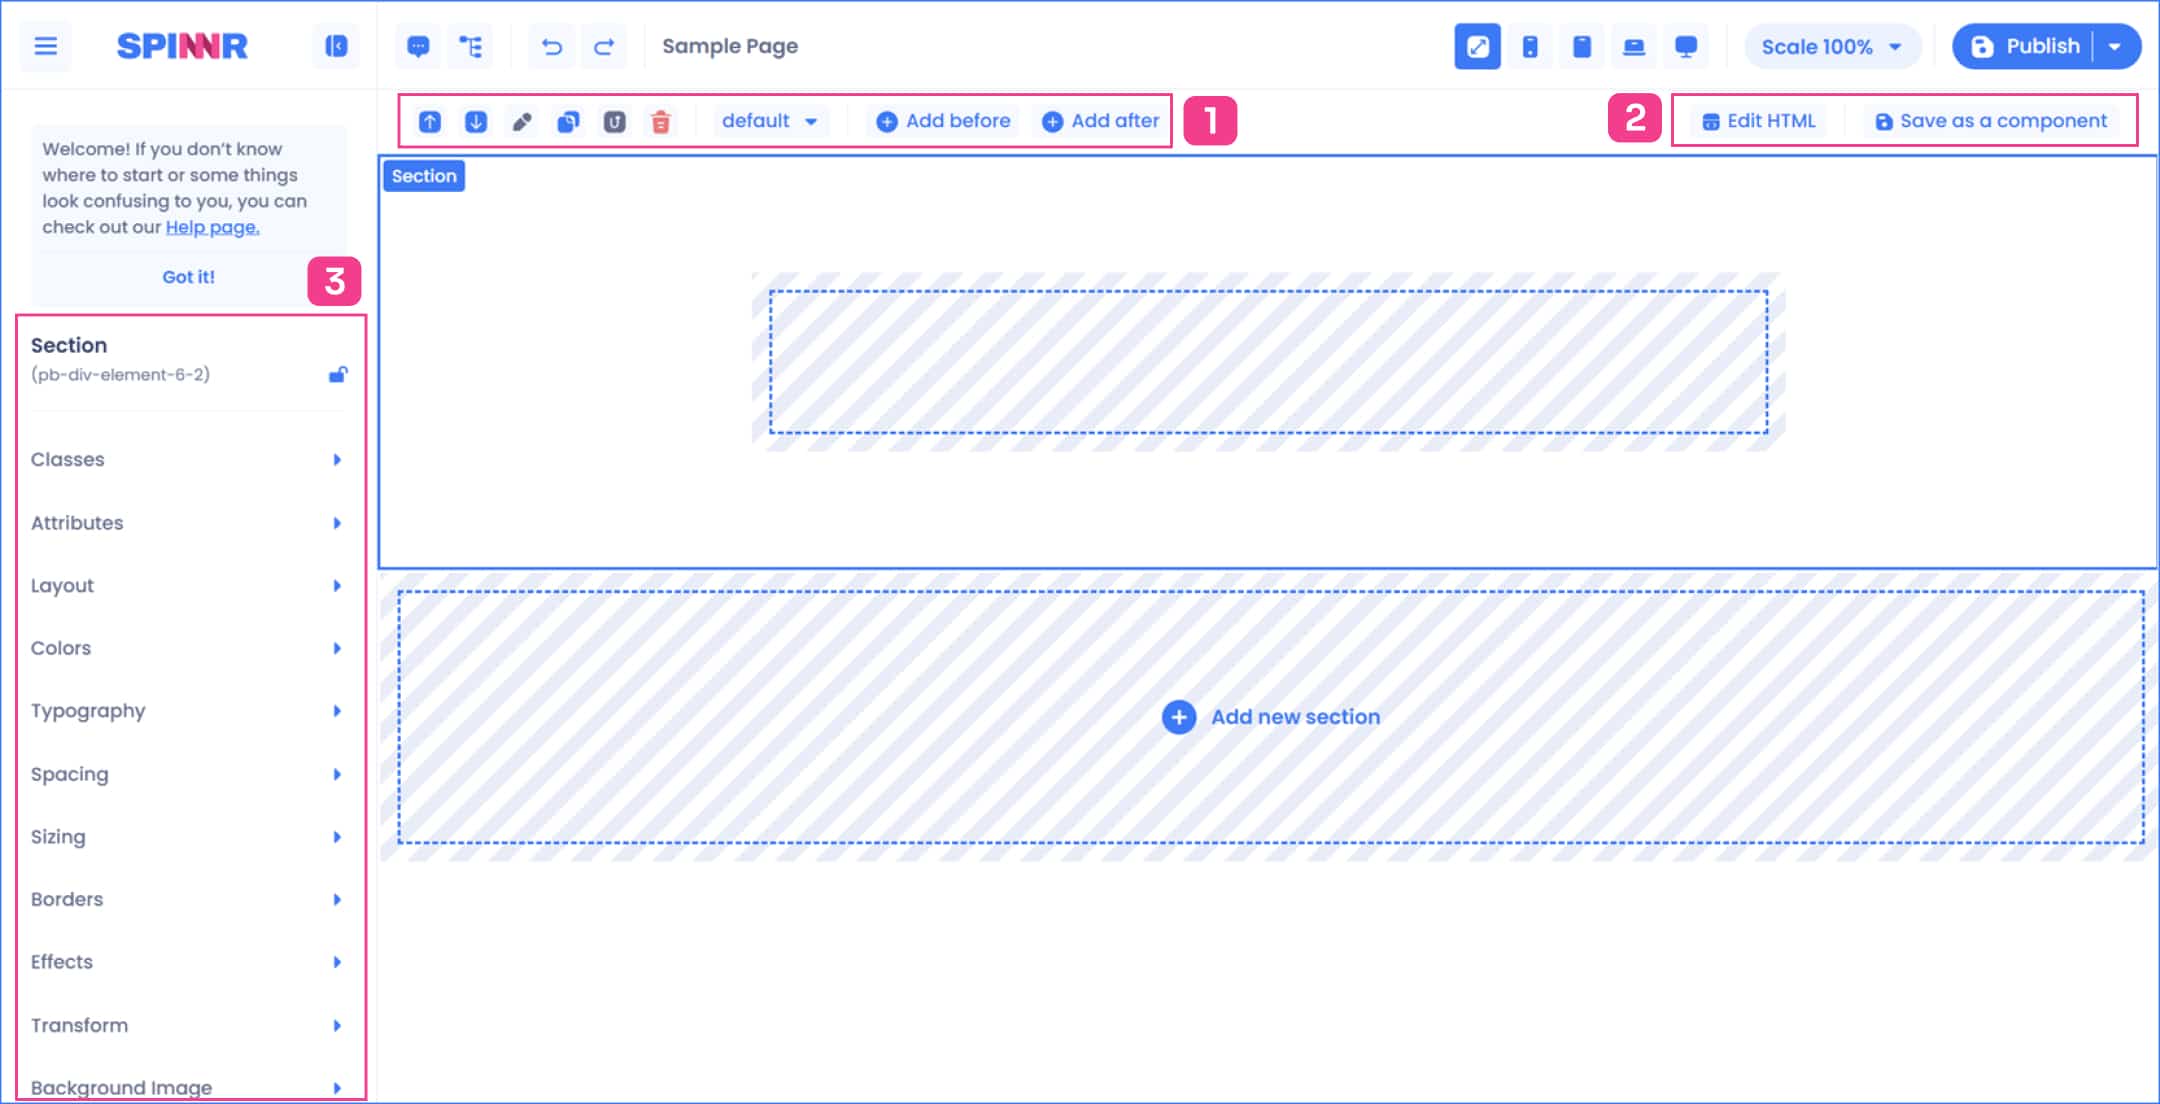
Once you have added a component to your page, you can select an element or component on the Canvas by clicking on it. Hovering over the element will show you which element you will be selecting. Some components have other options you can access by double-clicking on them or selecting it and then choosing component options on the left of the screen.
When you select an element, it will be outlined to denote that it is currently selected. You will also see additional Canvas controls to help you with the process of creating your page.
1 – Element Controls #
Moving Elements and Sections #
Reordering your elements and sections across your page can easily be done by using the move buttons in the canvas controls. Just select the element or section you want to move and click on the move buttons.
Remember that these options only move your selected element inside it’s own parent element and cannot be moved outside or to a different container.
Editing Text #
The system makes it easy for you to edit your content directly in the Canvas. To do this, select the text by clicking on it, then click on the Edit button in the Canvas controls. This will activate the inline editor to allow you to change the content.
Duplicating Elements #
You can easily copy or duplicate a section, component or element, using the Duplicate button in the Canvas controls. Clicking this button will copy the selected element together with it’s child elements and place it at the end of the parent container.
Up one level #
The move up one level option moves the element selection to the parent of the selected element.
Deleting Elements #
To delete a section, component, or element, click on the Delete button in the Canvas controls. This will delete the element currently selected including all of it’s child elements.
Default/hover/focus #
This option allows you to add effects to the elements
Add before or after #
Add ane element either before of after the sleected element. If a section is selected it will allow a new section to be added. If an element is selected it will allow
2 – html editing and save Component #
Custom HTML Code (adv) #
The page builder is very flexible and is not restricted to just adding components. You can actually add anything on your page with a little knowledge of HTML. This is where the HTML content editor comes in. Any code you add will still inherit all the classes you use and the core styles of your project.
To add custom HTML code, on the component sidebar click on the Add Custom Code button.
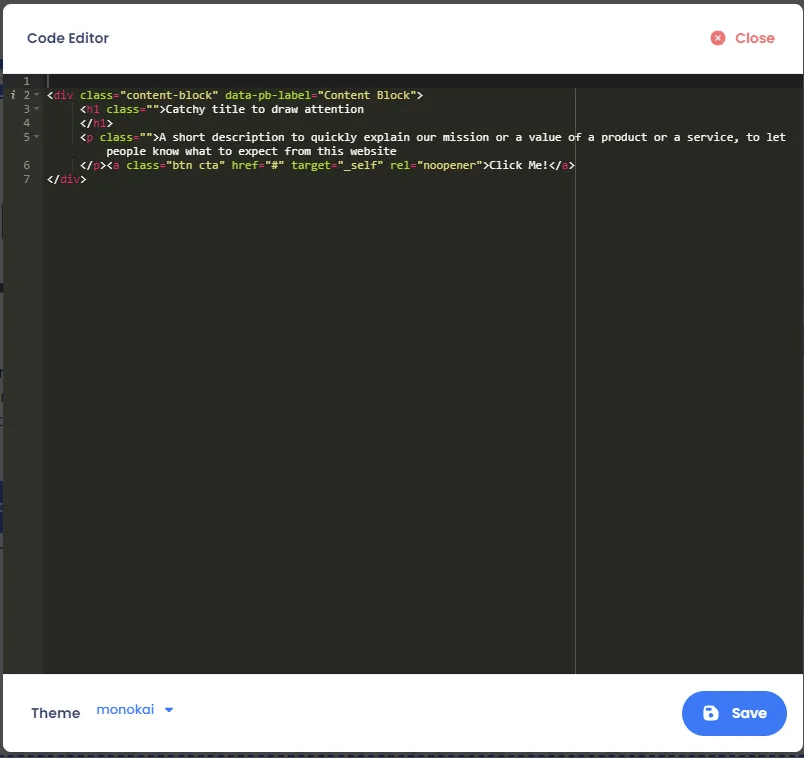
You can also change the code editor’s style by changing the theme. There are a couple of themes that mimic the style your favorite text editor.
ℹ️ When using the Code View function, make sure open tags have their corresponding closing tags for it to be parsed correctly.
You can add almost any tag with the exception of script tag to prevent script conflict with the page builder. If you want to add javascript please insert them using the Additional CSS/JS section.
Saving to My Components #
Allows you to save your own compoenents to a library to use later. See the Saving to my Components page for more details
3 – Adding a section #
Here you can add sections to your page. See Adding Sections for more details